Photography is all about capturing light in the most compelling possible ways. This sounds quite easy to achieve, and in many circumstances, the light won’t be calmly waiting for you to capture it in the most pleasing ways. You need to have a trained eye that knows how to react to specific lighting situations, and this is only achieved with practice. Today we want to share with you some bits of information that will make you a better photographer when the light isn’t as generous as you could wish it for.
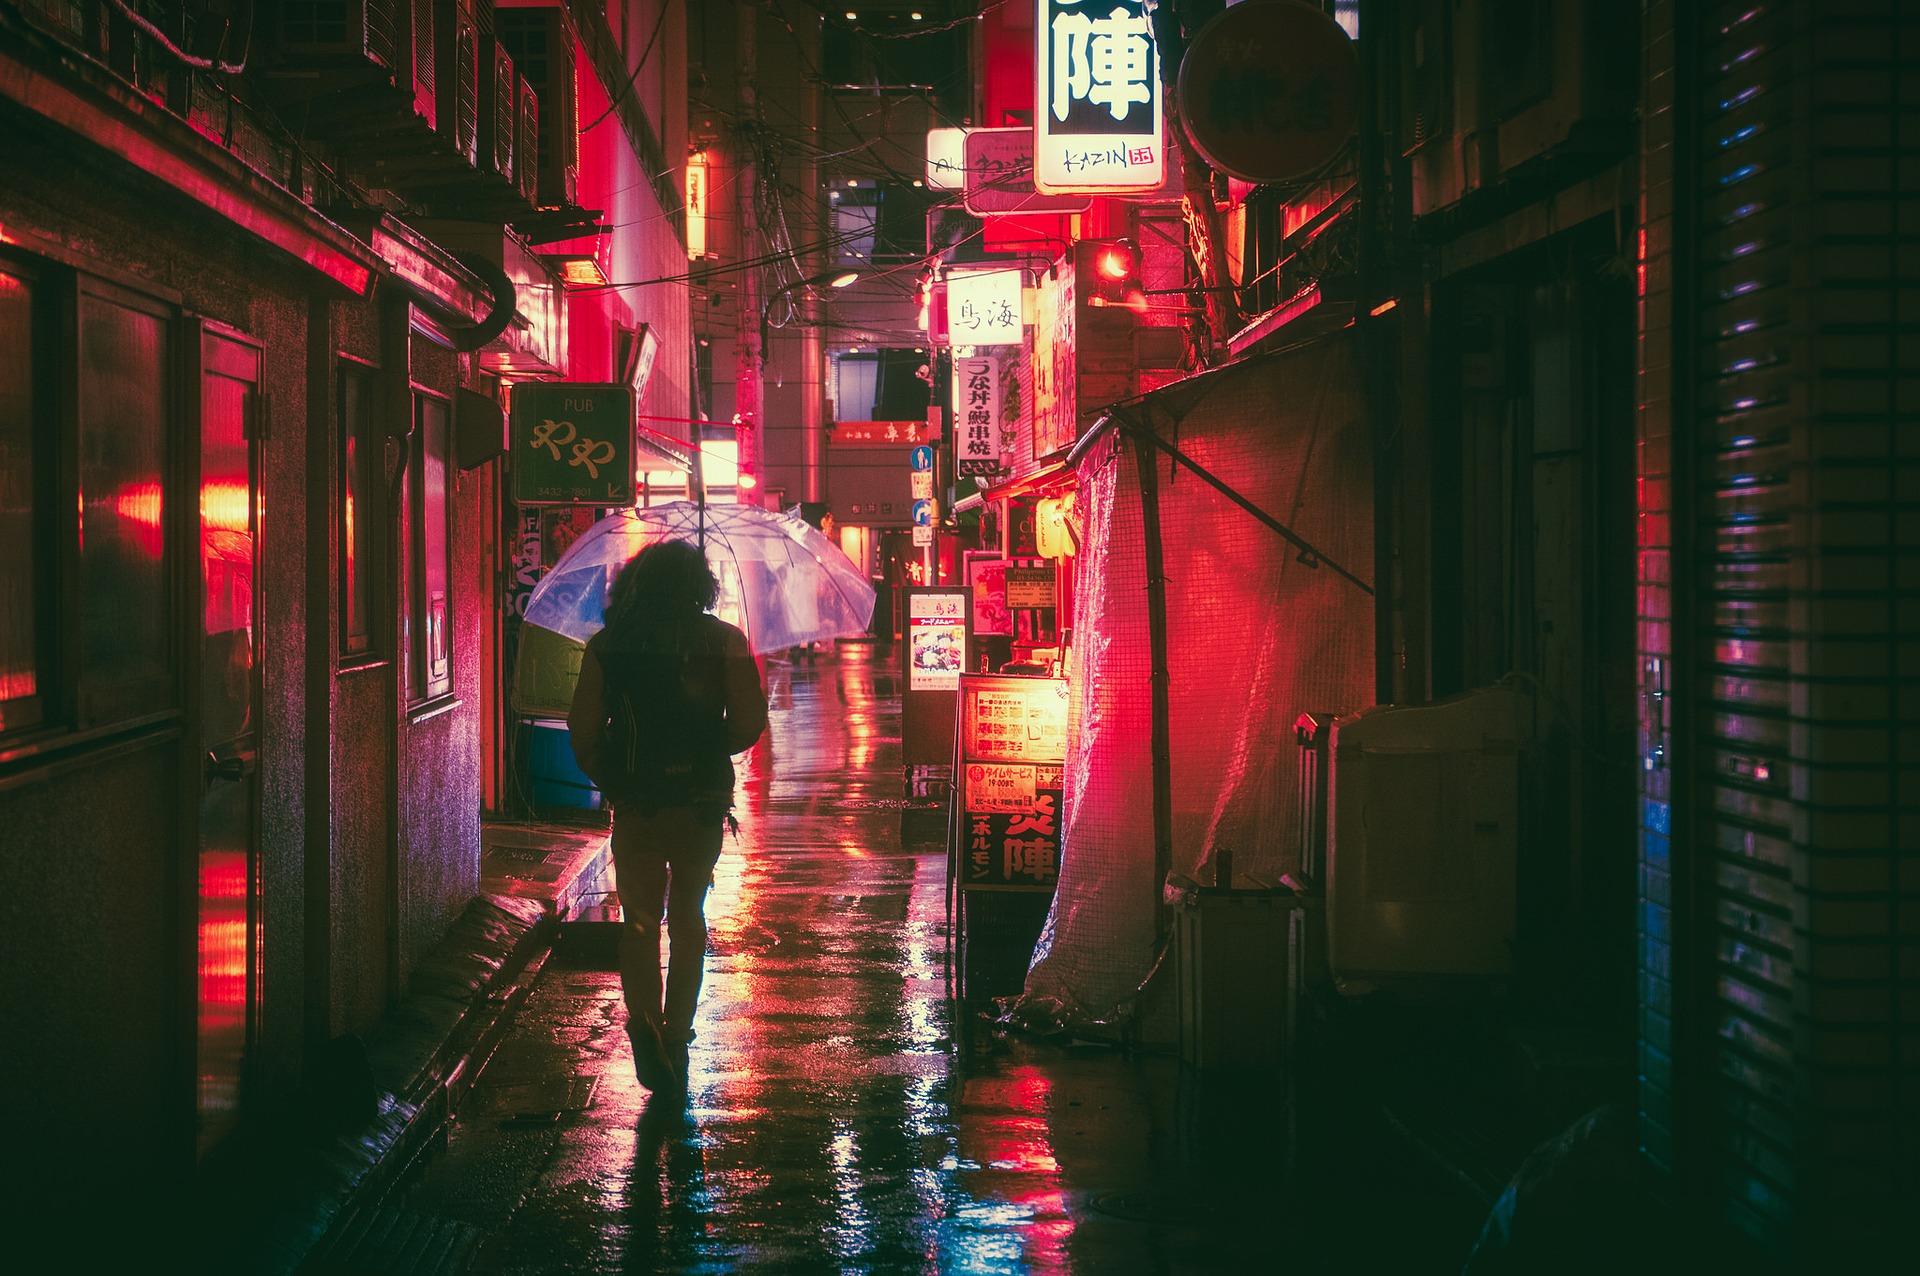
Low light can be soothing, and it can transmit a huge amount of moody feelings. In fact, low light is sometimes preferred rather than abundant light, but you still need to know how to deal with light when it is scarce. Otherwise, you’ll end with shaky or very noisy photos. So without further ado, let’s talk about the best low light photography tips we can share with you!

1- Get to know your camera
Long gone are the days in which any photographer wouldn’t dare shooting with a higher-400 ISO value. Nowadays technology has become better in practically all senses, and that includes ISO behavior and sensitivity. This one depends on what sensor your camera has, and is extremely important that you get to know what your camera is capable of doing.
The best way for doing this is to shoot some test shots that include a generous amount of dark tones with various ISO settings. First, start with the base ISO value your camera has. Some cameras come with a base value of ISO 100, other cameras come with 200. Increase the ISO values on each shot, and after cranking it up sufficiently, zoom in the photos. As soon as you start noticing unpleasing noise, then you shouldn’t shoot further from that.
Some cameras will start showing nasty noise at ISO 3200, others at ISO 1600. Getting to know your camera in this way will allow you to take wiser exposure decisions when the time is needed, especially under low light situations.

2-Lenses matters
One of the most powerful elements that build exposure is aperture, which is the one with f/x values. These values are sometimes hard to understand, but if you see them as what they are, fractions, and you mentally change that “f” for a “1” you’ll understand it better. By selecting different aperture values you will be allowing more or less light to enter through your camera. Therefore, if you have a low light situation, what you think you should want to have?
If you said “more light”, then you are correct! What you need to do is exactly that, you need to allow your camera to “swallow” more light. Each lens is capable of allowing more or less light depending on the largest aperture value. Some lenses have a variable maximum aperture value, like a kit lens for example. These lenses usually achieve a maximum aperture of f/3.5 at 18mm and f/5.6 at 55mm. That is a sad price to pay, but it allows people to understand the importance of that extra stops of light that are lost when changing from 18mm to 55mm for example.
Some lenses are extremely useful under low-light situations, like those that can deal with aperture values of f/1.4 for example. As soon as you start browsing lenses out, you’ll notice that some are way more expensive than others. Among building materials and inside-electronics components, aperture values are a decisive feature of a lens price.

3-Keep everything still
A good tripod will be your best friend in photography, pretty much always. But attaching your camera to it isn’t all you need to do in order to shoot decent exposures at low light situations. You also need to make sure everything is completely still. Therefore, use a remote release or at least shoot in timer mode. If you are shooting with a DSLR make sure to learn how to block your camera’s mirror. Everything from that mirror to your finger in the shutter button produces shakiness, and being extra careful won’t harm your precious shots!
4- Learn more about practical lighting
Alright, this is something we are borrowing from the film industry, but it will make your photography way more capable under low-light situations. You’ll need to watch this video about how Stanley Kubrick rarely used professional lighting solutions in order to understand the concept. Oh, and trust us, he was one hell of a photographer too! Life-spoiler warning, after watching that video, you’ll sort of diminish certain artificial lights.

5- Nice and Slow
Many low-light situations are best approached when slow shutter speeds are used. Of course, a tripod or at least something to make sure your camera stays perfectly still will be mandatory. Anything gets well lit after the proper amount of time has elapsed, and the best part is that based on this principle, you can use ISO 100 for extremely clean results.
What about an experiment? Go to your living room in the middle of the night, make sure your camera is absolutely still at ISO 100 and f/5.6 if you wish, then crank the shutter speed to 15 or even 30 seconds, and then press the shutter button. You’ll see that your living room appears to be perfectly lit. That is the beautiful magic of photography, it allows us to capture the world in a way our eyes simply can’t.
6- Be patient
Mastering photography isn’t something you achieve out of the blue, you need to practice and you need to be patient. If you are in front of a scene that could appear to you in a better way at a different time of the day, then wait for it. If you can’t simply wait, then sacrifice a bit of image quality with ISO. The trick is to know that something is been given in order to capture a scene that has limitations involved.
7- Do some research
If you wish to shoot a specific scene, then do some research about which is the best time of day according to the available light (and people too). This tool might come in handy for this. Sun and weather are very easy to predict, and sometimes overcast days give a better lighting situation than a sunny one. If you see a storm coming down your way, don’t freak out. Manage to get your gear dry, and you’ll be able to take photos that will make you immediately stand up from regular and lazy photographers.

8- Hack the Autofocus
Autofocus is one of the biggest wonders of modern and contemporary photography but is still quite clumsy under low-light situations. One beautiful trick is to target a different portion of the scene that is relatively at the same distance as your main object of interest and then recompose. If this isn’t viable, you can also give a scene an extra light with your phone’s LED light.
9- Use manual focus
If you simply can’t hack the autofocus, then you can try something more powerful, the manual focus. We don’t advise to use manual focus mode always, but for some situations, it will be more useful than the autofocus. With manual focus, you can truly watch what your lens is focusing on, and there shouldn’t be missed.
Some cameras nowadays even allow you to watch all that is getting perfectly in focus via a feature called “focus peaking”. It sorts of sprinkles out what is in focus in the scene, and it has been designed exclusively for manual focus. This feature is sort of exclusive of mirrorless cameras, so you won’t be able to see this magic pixies on a DSLR camera, but you can always rely on your eye. Oh, and remember to calibrate your camera’s diopter to the proper focusing distance if you use prescription glasses on a regular basis.
Wrapping it up!
The only reason why light could feel like a very uneasy to predict thing is due to a lack of practice. You need to see photography as a physical discipline that requires training, just like any average sport. New coming photographers have a peculiar mindset, they think that practice isn’t much required in order to capture things in a beautiful way. If you ever feel like this (we all are guilty of this at least once, don’t feel bad about it), grab your camera, get out of your place, and start practicing again!
If you are able to read between the lines, you’ll see how we’ve covered the principles of the exposure triangle here, but in a more digestible way. The fundamental skill that you need to develop here is being able to expose properly in any lighting situation. We really hope that all these tips that we have shared with you here will actually make you a better photographer with time. On the next run, we’ll talk about the opposite, about how to shoot photographs with harsh light situations.
To learn photography by top photographers, check our Online Photography Courses.
Give a friend $15 off their first class and we’ll take $15 off your next one
get started
Or use your personal link to share:

You’re going to love Art And Creativity! Use my link to take $15 off your first Art And Creativity class!
Share with your friends using Twitter. When posting please do not delete your personal link.
Share with your friends using Facebook Messenger by clicking the button below:

